Friday 27 March 2015

Fairy Wishing Bottles

Origami stars are said to bring good luck when presented in jars as gifts to loved ones.  This craft puts a bit of a shabby whimsical spin on the tradition.  It's easy to do with children (even if you make the stars ahead of time) and they can make their own favours at a Fairy-themed party!

fairy wishes craft DIY book page art ribbon rose glass vial miniature

To make these cute bottles, you will need the following:

  • 6mm strips of quilling paper in pastel colours
  • 3mm satin ribbon
  • needle and thread in a colour to match your ribbon
  • small craft vial with cork
  • resin flower the same size as the cork
  • fine glitter
  • scrap of regular printer paper
  • sticky tape
  • book page
  • double sided tape
  • craft glue and bamboo skewer
  • pencil and eraser
  • scissors

glitter quilling paper book page glass vial ribbon resin rose


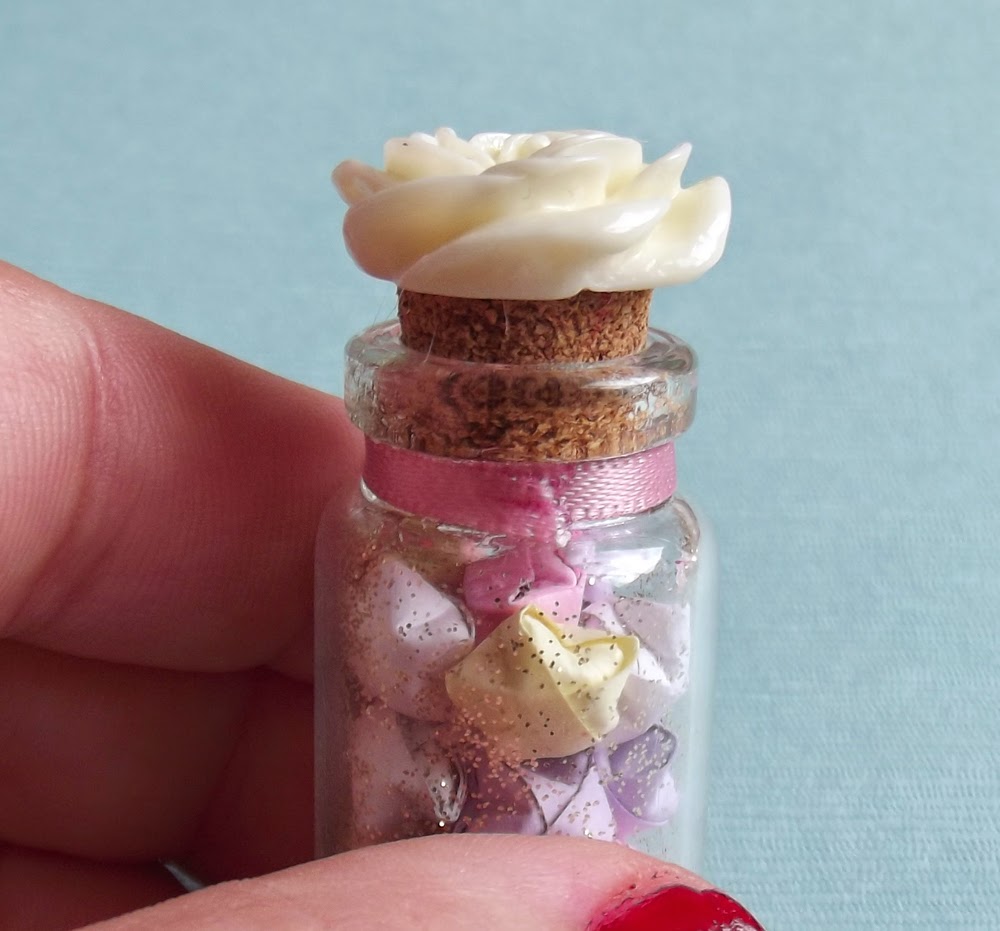
Quilling paper can come in a variety of widths.  For my little vial, pictured above, I used 3mm strips, but for the larger bottle, being made in this tutorial, I used the 6mm.  Each strip should yield about 4 - 5 stars.  You could, of course, use a paper trimmer to create your own strips from your choice of paper.  Just be careful that the paper is not too thin, or it will break when you try to knot it, and that it's also not too thick or it will be hard to fold.  Giftwrap would be perfect.


quilling paper star lucky origami pastel paper how to DIY craft

To make the stars, start by tying a knot in one end of a paper strip.  Carefully tighten and flatten the knot, then trim the short tail.  You should be left with a pentagon shape with a long tail.  Fold the long tail up and across the front of the pentagon.  Then fold in down the back.  Fold it back up across the top to the opposite 'shoulder' of the pentagram, then down the back again.  Tuck the long end of the strip under the top fold at the front of the pentagon.  Pull it through and then trim it so that you're left with just the pentagon.
Hold the pentagon between four fingers of your left hand, then use your thumbnail on your right hand to push into the fifth side.  Repeat for each side.  As you push into it, the star will 'puff' out.  Pinch the points to give them more definition.  Make enough stars to fill your vial without packing them down.

funnel diy glitter paper how to no mess

Next, make a simple funnel to put the glitter in the vial.  Cut a semi-circle from your scrap of paper.  Roll it into a cone, making sure the is a small gap at the bottom, and secure with sticky tape.  Place the narrow end into the vial and slowly pour in the glitter, giving the funnel a little shake now and then to help the glitter pass through.

glass vial bottle stars origami lucky wish glitter gold resin rose cork diy craft how to

When you're happy with the amount of glitter in the vial (a little goes a long way!), use the bamboo skewer to apply craft glue to the inside of the vials' rim and insert the cork.  Put some more glue on the top of the cork and stick on the resin flower.  Set aside to dry while you make the ribbon rose to go around the neck of the vial.

Thread a needle with some sewing cotton the same colour as your satin ribbon, tie a waste knot and have on standby.  Starting with about 15cm of satin ribbon, bend it at 90 degrees in the middle. If you've ever made crepe paper streamers, then this method will be familiar.  With the fold as shown below, fold the horizontal ribbon across to the right.  Fold the vertical ribbon up over the fold you just made.  Fold the horizontal ribbon back to the left, then the veritical ribbon back down.
Keep folding the horizontal ribbon across and the vertical ribbon up and down, alternating them, until you form a concertina about 2.5 - 3cm long.

ribbon rose how to diy craft concertina sewing needle and thread pink

Hold the bottom of the concertina between two fingers and pull gently on one of the ribbon ends to form the rose.  Pinch it between your fingers so it doesn't unravel, and use the threaded needle to sew a stitch or two to secure the rose.  Trim the ends of the thread to make the stitching as invisible as possible.  Use the bamboo skewer to put a dab of glue on the neck of the vial.  Hold the rose in place on the glue by wrapping the two ends of the ribbon around the neck and pinching them at the back for 30 seconds.  Glue and trim the two ends of the ribbon at the back of the vial.


glass bottle vial stars lucky origami wish gold glitter ribbon rose resin rose pastel amethyst ring

glass vial bottle cork resin rose ribbon rose origami quilling paper stars pastel lucky gold glitter

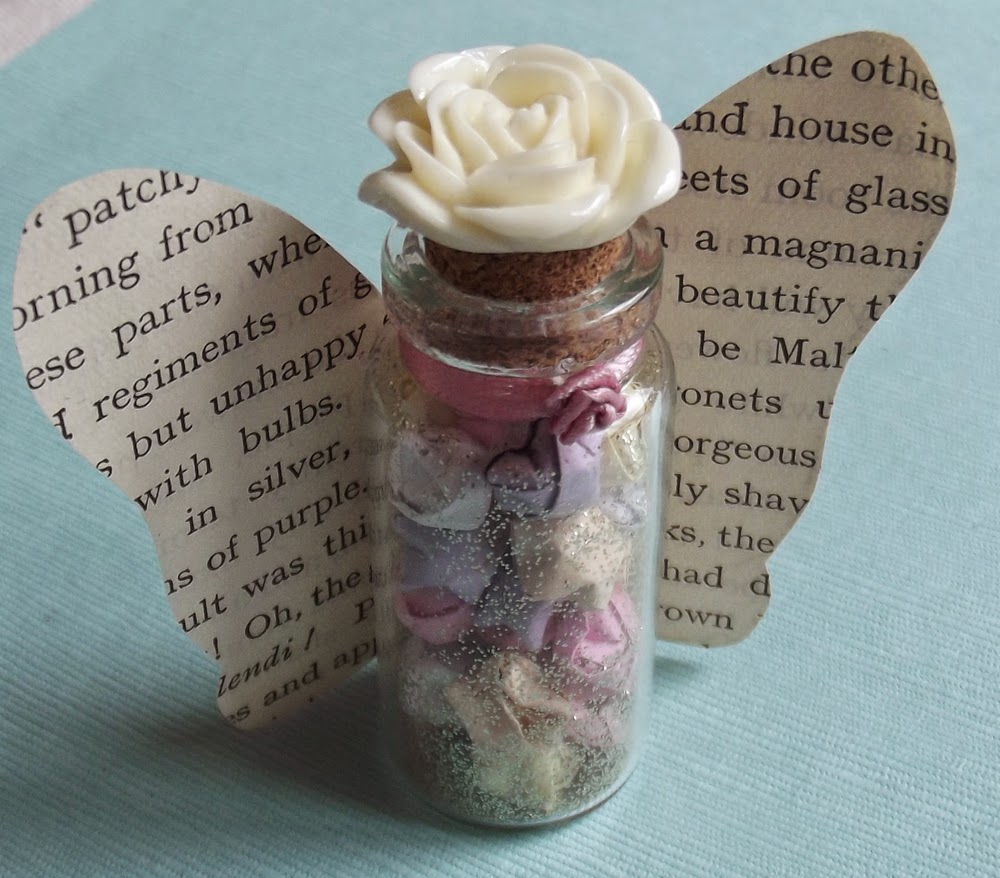
Fold your book page vertically in half, lay the vial down on the fold to give a size guide.  Draw freehand a simple butterfly wing shape and cut it out, keeping the folded edge intact.  Gently erase your pencil marks and then use double-sided sticky tape to attach the wings to the back of your vial.

book page art fairy wings butterfly wings drawing freehand folded paper

book page art craft diy fairy wings butterfly wings text  folded paper

Congratulations, you've just made a gorgeous little fairy bottle full of lucky wishing stars!

If you don't feel confident drawing your butterfly wings, try printing some out from a google search.  Or you could use a rubber stamp on some vellum.  If you're into parchment craft you could create gorgeous lacy fairy wings.  You could even sew some out of felt or embroider them!
These jars would make great table number holders or photo holders by omitting the resin flower on top, and inserting wire into the cork instead.  Coil the other end of the wire to create a folder for a piece of paper, postcard or photograph.  It could even hold earring cards, business cards or little signs on a market stall!

Fairy statuette figurine statue glass vials button resin rose ribbon rose gold glitter pastel colour quilling paper origami lucky stars wishes book page butterly wings

I made the smaller bottle first, using 3mm strips of quilling paper to give absolutely tiny little stars, and topped the bottle with a button.  I just bought a heap of these glass vials from a local discount store, so watch out over coming weeks for more projects featuring them!
By the way, the fairy figurine featured here is The Crystal Keeper by Christine Haworth.  Thanks to my family for building my fairy and angel collection over many Christmases and birthdays!

As always, I appreciate it when you take the time to make comments and I will always respond back. Don't forget, if you try any of my tutorials, please share it with me, either in the comments, on Instagram (just include @liliflorapretty in the description or comment) or on Facebook (see the link at the side to follow!)

Take care!
Emma

Friday 20 March 2015

Shabby Rosie Posey

Welcome to this week's tutorial: making your own gorgeous little shabby chic poseys!  This tutorial will also feature a couple of alternative uses for your posies and flowers.  Let's get making!

shabby chi rose flower lace velvet button pearl bead

For this tutorial you will need the following:
  • Velvet ribbon 1.5cm wide cut to 10cm lengths (5/8ths" by 4")
  • Lace. Mine is 3.5cm cut to 12cm lengths (1 3/8ths " by 4 3/4")
  • Florists wire.  The wire used here comes in 46cm lengths (about 18"), some are left full length for beading and stringing buttons, others are cut in half for the velvet and lace roses.
  • Needle and Thread (use a colour that blends in with the lace)
  • Scissors
  • Ruler
  • Ribbon for tying posey
  • Florists or washi tape
  • Pliers (preferably a pair each of needle nose and round nose, as well as nippers for cutting the wire.  If you only have a pair of normal household pliers, that's ok.  See the notes in the tutorial about how to use these.)
  • Beads.  These could be glass or plastic.  Use a mix of pearls, rounds and spears.
  • Buttons.  Make pairs of buttons, one larger than the other.
  • Craft glue, bamboo skewer and cardboard to protect your work surface.

velvet ribbon florist wire craft glue scissors pliers ribbon beads wire

Method

Start by forming your velvet ribbon roses.  For full instructions, check out my Rolled Rose Tutorial post.

rolled rose velvet ribbon fabric craft diy flower

Make 3 each of light pink and dark pink.

Next, make the lace flowers.  Thread a needle with sewing cotton in a colour to match your lace (mine is slightly contrasting so you can see it) and form a large waste knot at the end.  Roll up the first 2 centimetres (1") and put a stitch through the bottom of it to hold it in place.  Make large basting stitches along the bottom of your lace, then pull and coil the lace to form a ruffled rose shape.  Put a few stitches through the bottom of it, making sure to sew through all the layers.

lace rose flower wire pliers sewing

Using a pair of flat pliers (or household pliers wrapped with masking tape to soften the ridges), wrap the end of one of your half-lengths of wire around the base of the lace rose.  Make sure to enclose all the layers, and squeeze to tighten.  Make 6 lace roses.

To add stems to your velvet roses, start by making a coil at the end of one of the half-lengths of wire.  Use round nose pliers to get started (or use household pliers and bed the end of the wire around the bamboo skewer), then use needle nose pliers, to pinch the coil and bend it along the length of the wire.  When the coil is about 1cm in diameter, bend it at 90 degrees to the rest of the wire length.

wire wrapping pliers coil flower rose velvet ribbon

Use craft (or hot glue if you prefer), to bond the velvet roses to the wire coil.

To wire the buttons, use full length wires folded loosely in half.  Thread the two ends into the buttonholes (diagonally opposite if using buttons with 4 holes) of a small button and a larger button.  Hold the wire with pliers and turn the buttons with your fingers to twist the wires together and secure the button so it doesn't move.  Continue to twist the length of the wire together.  Make 3 - 4 button wires.

buttons wire pliers wire wrapping

Use a similar method for the beaded wires.  Fold a full length wire loosely in half to find the middle.  Thread the bead, pearl or crystal on one end until it's in the middle, then twist the wires by holding them near the bead with pliers and using your fingers to turn the bead.  Be careful to wind onlly tight enough to stop the bead from moving, without over winding as they can be fragile.  Make 2-3 beaded wires for each kind of bead you're using.

olive green plastic glass crystal spear briolette wire

Put together your posey by holding the stems in your hand, adding different types of roses, button wires and beaded wires, until it's all together.  Use the florist or washi tape to hold the posey together, and then use a ribbon to tie a bow.  Trim the stems as necessary with pliers.

roses flowers buttons beads crystals wire washi tape

lace buttons beads crystals wire velvet

vevelvet ribbon buttons lace beads pearls crystals

lace velvet roses flowers bouquet posey washi tape

Posey's like this make great decor and gifts, but there are many other applications for these forever flowers.
Boutonniere corsage wedding favour ribbon flowers key vintage

This boutonniere was made with a lace rose, a velvet rose, a button and a plastic rose which was attached to a wire using the same method as the velvet rose.  The stems were then wrapped in white ribbon and the vintage style key tied on with ivory ribbon.

embroidery hoop tag shabby flowers roses lace ribbon button

This wreath was made with an embroidery hoop.  Wide white ribbon was wrapped around where the flowers were going.  A posey of lace, velvet and plastic roses with bead and button wires was attached in place with pink lace and pins.  The shipping tag was stamped and the lace was attached with double sided tape before the button and rose were added with glue.  Finally, a ribbon was attached to the top of the tag and the tag attached to the hoop with double sided tape.

hair slide accessory fashion roses ribbon button velvet

Three lengths of wire were used to anchor the plastic and velvet ribbon roses.  The ends were coiled  and then the wires were glued to the middle of the slide.  The glue was hidden with ribbon and buttons glued on, then the flowers attached.

Thought of more uses for these pretty little poseys?  Let me know in the comments, and share your pics on instagram! (tag me in @liliflorapretty so I can share it)

Keep watching over the next few weeks for some exciting developments for both Liliflora Pretty and a revisit to a previous project I may have just found a happy home for!

Take care,
Emma


Saturday 14 March 2015

Make your own Spools and Framed Business Card Holder

Two tutorials in one post!  Because both of these are so quick and easy, I'm putting them together in one post.  Enjoy!
shabby chic craft ribbon lace spools pinsfabric pockets folded frames fans please take one business card holder


First, lets learn how to make your own spools for keeping your trims, ribbons, lace and braiding neat, and even making them display-worthy!  I should firstly point out, that this is not my original idea.  I was inspired by this post by Vanessa Renders.  The post is not in English, but the pictures are very self-explanatory.  Head along to see her lovely photos, I think her spools are wonderful and make a more complete display than mine do.  The extra effort and embellishments will be sure to inspire you!

Here's how I made mine:

Materials:
  • glue gun
  • toilet rolls
  • cardboard for ends (I used the flaps from a nappy box)
  • my Spool end printables, or book pages, wrapping paper, music notation or scrapbooking paper
  • glue stick
  • scissors
  • trim, ribbon, lace etc.
  • pins
Toilet roll craft book page craft ribbon trim beads pearls

Method:

Start by cutting circles out of the cardboard.  Mine are 7cm in diameter and I got that by drawing around a wooden spool I already had.  Use a teacup or similar to get about the same size.  The printable circles you can download through the link above are 8cm in diameter.  Use a glue stick to attach your paper to your cardboard circles.
Cut your toilet rolls to size as well, if you wish.  I left one full size, the others I cut roughly in half.
toilet rolls cardboard craft pearls book pages


Use hot glue to attach some trim to the edges of your cardboard circles.  Most of mine are edged with twine, but one I've done with continuous pearl bead trim.  If you doubled up the thickness of the cardboard circles, you could attach a wider trim, like a braid or ribbon.
cardboard craft DIY toilet roll pearlstoilet roll craft cardboard diy pearl trim
Apply hot glue around the rim of one of your toilet rolls and place in the middle of the back side of one of your spool ends.  Hold in place for 10-15 seconds until the glue sets.  Repeat for the other side and your spool is complete!  When the glue is all set, wrap your ribbons or trims around your spool and secure in place with a pretty pin.

toilet roll cardboard craft DIY trim ribbon pearls pins book pages printables roses lace trim

toilet roll cardboard craft DIY trim ribbon pearls pins book pages printables roses lace trim

The printable for this project is basically several circles of Coy Blooms patterns.  A friend (Hi Joey!) and I brainstormed a few other uses for them, such as a garland (print several copies, cut them out and then sew them together) or as coasters (either just by laminating them, or by decoupaging them onto a cork or wooden base and sealing) or even as pretty liners for jam jar rims.  Share your ideas for how else they may be used in the comments below!

And now for our second tutorial:

fan business card holder banner DIY printable craft
This craft would be great to display business cards and brochures in a shop or a market booth or for fans at an outdoor tea party or wedding on a warm day.  It would also be great for favours at a party, like pinwheels, pencils, bubble wands, fairy wands, nail files, chopsticks or even paintbrushes.  Basically anything thin will do!

For this simple project you will need:

  • a picture frame big enough to contain the items you want to display
  • fabric
  • "Please Take One" printable banner
  • scissors
  • bone folder or embossing tool
  • double sided tape
  • fabric marker and ruler
  • items for display

frame fans printable business card scissors fabric embossing

Method:

Start by dismantling your frame, setting aside the glass and any image that was inside it.  Use the backing board as a guide for cutting your fabric.  You need a piece of fabric the same width as the backing board, and at least 1 1/2 or 1 2/3 as long.  If your fabric piece isn't big enough to give you all the length in one piece, you can cut two, with one being the size of the backing board, and the other being the 1/2 -2/3 length.
lay your fabric on the backing, fold up at the bottom then back down again to give you a pocket.  If you cut your fabric in 2 pieces, fold your smaller piece in half and lay it over the larger piece at the bottom of the backing.  Place the frame over the top and secure in place without disturbing the fabric.

frame fabric pocket tutorialframe fabric pocket cutting mat

Cut out one of the banners from the printable and use the embossing tool to mark the two folding lines on either side of the text.  Fold as per the following pictures:

printable banner folding tutorialprintable banner folding tutorialprintable banner folding tutorial

Apply double sided tape to the back of the banner ends, and then attach to your frame.  Fill the pocket with your chosen items and put on display!
fans pocket roses frame wedding idea

stripes business card holder pocket market booth styling

You can get inexpensive picture frames pretty much anywhere, I got mine from the sale bin at a discount store, but you could find them at landfill shops, charity shops or garage sales.  Got an idea about how to use the leftover glass?  Share it in the comments below!

I hope you enjoyed these tutorials and will find them useful.  Don't forget to comment, share on Google+ and Facebook or Pin these projects so you've got them for later!

Best wishes,

Emma

Sunday 8 March 2015

Shabby Chic Tag Bunting Affirmation Garland

Following an experiment with the fun neon stationary that came with the New Years' issue of Mollie Makes, I decided to have a go at a different style of bunting.  Because, hey, who doesn't love bunting!

Shabby Chic Tag Bunting Affirmation Garland Tutorial

This tutorial is no-sew and really easy.  It's a great way to use up some gorgeous fabric scaps and show off those little treasures and blingy bits we all seem to accumulate as crafters.  To make it even easier, I've already created some tags for you!  Download them (Page 1 and Page 2), and follow along with the instructions below the main tutorial!

ribbon lace tags roses bunting charms


You will need some large buff coloured shipping tags, mine are about 5.5cm x 11cm (2" x 4 1/4").  You can find these in newsagents and stationary supply stores.
You will also need something to string your bunting together.  I used some bakers' twine with some subtle metallic thread twisted through it.  You could use twine, ribbon, lace, a tape measure, braided cord or even chain or some of that fluffy cord they use to trim fancy lingerie!
I made my bunting 1 metre (approximately 40") so I could string it along a shelf near my desk.  Because my tags are fairly large versus the length of the bunting, I only need about 7 tags so it doesn't look too cluttered.  If your bunting is longer or your tags are smaller, you could use more of them.  Depending on how many other ribbons, embellishments or fabric scraps you want to string along your bunting, the tags could be spaced close together or further apart.  I like my bunting to not be too fussy, so my tags are about 10-15cm (4"-6") apart.

To decorate the tags and fill the gaps, you'll need any (or all!) of the following (or whatever else this list inspires you to use!):

  • Fabric scraps.  I'm using scraps my from Coy Blooms fabric collection
  • Ribbon in colours to compliment your fabrics of varying textures and widths
  • Old book pages, music notation, kraft paper, decorative paper (e.g for scrapbooking or giftwrap)
  • Washi tape, glitter tape, foil tape
  • Beads, charms, chandelier crystals, bells, rhinestones, buttons or any other suitable embellishments
  • Tassels, chain, continuous beaded string, ric rac, lace.

ribbon fabric buttons chain tags chandelier lace beads bells


To finish this bunting you'll need the following:

  • Scissors
  • Double-sided tape
  • Craft glue, hot glue, glue stick
  • Coloured pens, markers, metallic pens, gel pens


The idea behind this project is to include affirmations, words of encouragement and inspiration.  Hand write these on your tags or on the paper and fabric you stick to your tags as you go along.  Here are some examples of what you might write:

  • You can do it!
  • You go, girl!
  • Never Stop Dreaming
  • Believe
  • Keep Trying
  • Keep going
  • You're Awesome
  • You're the Best
  • Don't give up!
  • Fighting/ Hwaiting! (ok, showing my love of K-Pop here!  Hwaiting, pronounced as Fighting, is a popular word in Korea.  It's meant as an encouraging 'You can do it!' and is normally said while making a fist-pumping action.  Don't say I don't teach you anything!)

Include an affirmation on at least half of your tags.  Make it as personal as you like, it's all about you!

rhinestones roses lace ribbon fabric charms washi tape


Getting Started

Start by cutting your bunting string to length, remembering to leave enough to tie the ends into loops so it can be hooked or pinned up where you want it.  Arrange your tags along the length, without attaching them, to get a real feel for the spacing and how many tags you will need.

Now, the fun bit: decorating your tags!  Use a glue stick or double-sided tape to apply papers and fabrics, and use craft or hot glue to attach charms, buttons and other embellishments.  Hand write your affirmations as you go.  Here are detail shots of my tags and a few notes on how I made each one:
ribbon foil tape glitter tape dream handlettering rose charm
Fabric, ribbon, foil tape, rose charm applied with hot glue,
 and handlettering.
rose lace rhinestone book page
Torn book page with fabric cut with pinking shears, rhinestones
and lace applied with hot glue.
button key mint bookpage ribbon
Book page and fabric with ribbon, button and key charm

lace charm handlettering affirmation thread ribbon fabric
Affirmation on craft paper in brass frame on fabric, lace, and ribbon
glitter tape fighting hwaiting rosebud pearl foil tape handlettering
Handlettering with foil tape, glitter tape, flower punched book page with fabric rosebud and flatback faux pearl
handlettering fabric velvet ribbon rhinestone button lace
Handlettering with fabric, velvet ribbon, lace, and hot glued button and rhinestones
fabric ribbon foil tape rose charm
Fabric with ribbon, glitter tape and foil tape and a rose charm attached with hot glue

Unless you're going to be hanging them somewhere they will be seen on both sides, you really only need to decorate one side.

When you're happy with your tags, use ribbon, lace or twine to attach them to your bunting string.

Between each tag, tie on ribbons, lace, ric rac, fabric scraps etc.  Doubled over washi tape, or paper held in place with double sided tape can also be used to fill in the gaps.  I used some dragon tear drops and bells to make mine sparkly and sensory.  A few tassels and beaded string and it's all done!

lace ribbon beads tags garland bunting


A great Crafternoon project to put some positivity in your day, and put some of your lovely craft supplies on show!

For an even quicker version, download my printable tags (Page 1 and Page 2), featuring Coy Bloom patterns and already adorned with encouraging messages.  Here's what they look like (Yay!  My first printables!):

free printablefree printable

Start by printing them out on the sturdiest cardstock that will fit smoothly through your printer.  Don't scale or clip before printing, just print at 100%.  Cut out the tags and strips using scissors or a rotary trimmer.

free printable

You could punch holes where indicated on the tags to hang them from your string (I used cotton string for this one, see above for other ideas!), but I just attached them using glitter tape to keep the string flat and give a bit of sparkle.

free printable

Fold the strips in half and use scissors to cut a tail as shown below:


Apply double-sided tape to the back of one half of each strip.  Position the strip so the string sits in the fold line, then take the backing off the double sided tape and press the two sides of the strip.  There are enough strips to sit between each tag and at either end of the bunting.

When all your tags and strips are attached to your bunting string find a place to hang it where you can see the positive messages everyday!
free printable tags


I hope you enjoy this tutorial.  Don't forget to let me know what you think of it in the comments.  Oh yeah, and I'm now on Google+, so add me to your craft and blog circles for more tutorial updates!

Have a great week!
Emma